
REVIEW · WEST COAST AND ARTHURS PASS
Auckland City and West Coast Full Day Tour
Black-sand Piha and city icons in one day. I love the small-group feel and the big payoff of Piha viewpoints, with a guide who makes the geology and culture click. The main drawback is simple: it is an 8-hour day, and weather can mean a few stops shift.
You start in central Auckland at 9:00 am near Sky Tower, then spend the day bouncing between crater-lake views, harbour photo spots, and the wild West. The value is that you do not need to rent a car, and the tour covers transport, park fees, and a full lunch plus snacks and water along the way.
In This Review
- Key things to know before you go
- Why This Auckland-to-Piha Day Works Without a Rental Car
- Sky Tower Pickup, Mercedes Comfort, and the Snack Rhythm
- Crater Views in Takapuna: Lake Pupuke and Takapuna Beach
- Westhaven Promenade and Auckland Domain: Marina Boats to Museum Rim Views
- Parnell Homes, Harbour Bridge Drives, and Rangitoto Island Vistas
- Titirangi to the Waitakere Ranges: Leaving the City Behind
- Piha Beach: Black Sand, Surf Energy, and Lookout Time
- Arataki Visitor Centre: Rainforest Views Back Over Auckland
- Lunch and Snacks: Staying Comfortable on an 8-Hour Loop
- What the City Portion Adds (Even If You Skip the Museum Inside)
- The Guide Factor: Personal Attention That Changes the Day
- Who Should Book This Auckland City and West Coast Tour
- Should You Book This Auckland City and West Coast Tour?
- FAQ
- How long is the Auckland City and West Coast full day tour?
- Where does the tour start, and is pickup offered?
- What’s included in the price?
- Is lunch provided?
- How big is the group?
- Does the tour run in bad weather?
- Can I cancel for a full refund?
Key things to know before you go
- Up to 15 people means you get more direct attention at viewpoints, not just a bus full of strangers.
- Mercedes luxury vehicle + pickup makes the city driving part easy, especially on a full day schedule.
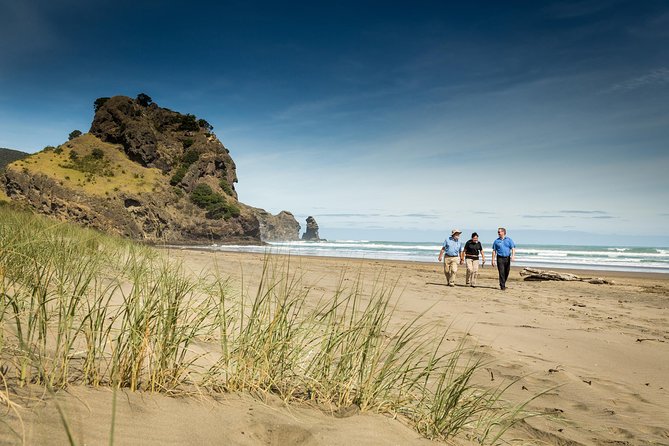
- Piha and Arataki are the big nature payoff, with black sand at Piha and rainforest lookouts at Arataki.
- Auckland highlights roll past in the morning, including Harbour Bridge views and volcanic scenery around the Auckland Domain.
- Food is built in (lunch, snacks, bottled water), so you can focus on the sights, not hunting for cafes.
- Expect weather: the tour runs in all conditions, and guides sometimes adapt if conditions get rough.
More ways to fill a day out of Auckland
- Hobbiton & Waitomo Caves Guided Day Trip from Auckland incl lunch
★ 5.0 · 2,677 reviews - From Auckland: Hobbiton & Waitomo Caves Day Trip with Lunch
★ 4.9 · 2,505 reviews - Auckland Dolphin and Whale Watching Eco-Safari Cruise
★ 4.5 · 1,790 reviews - Auckland: Hobbiton Movie Set Day Trip with Festive Lunch
★ 4.8 · 1,431 reviews
Why This Auckland-to-Piha Day Works Without a Rental Car
This is a smart way to do Auckland and the West Coast in one hit. The city parts are the kind of places you can technically reach on your own, but getting the timing right and then switching into the countryside is where a day can fall apart. Here, the driving is handled for you in one continuous route.
The other big win is the guide’s role. On a day like this, you are basically collecting viewpoints. A good guide helps you connect what you’re seeing to why it looks the way it does, whether that means volcanic formations, coastline shapes, or the meaning behind Māori and local stories shared along the way. You still get your time to look around, but you are not just taking photos on autopilot.
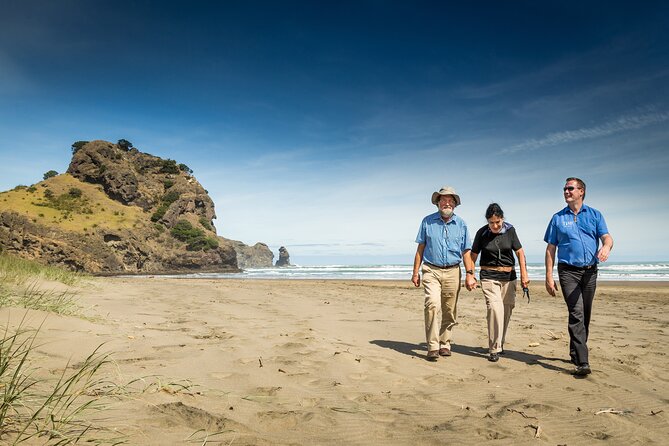
Finally, small-group touring matters on roads that wind through neighbourhoods and out toward the Waitakere Ranges. With a group kept to a maximum of 15, you tend to move more smoothly at pull-offs and photo stops.
Sky Tower Pickup, Mercedes Comfort, and the Snack Rhythm
Meet near Sky Tower on Victoria Street West at 9:00 am. Pickup is offered, and the day ends back at the meeting point, so you are not trying to remember transit logistics in the evening.
You’ll ride in a Mercedes luxury vehicle with a professional driver/guide. That matters more than it sounds when you consider this is a full-day loop: you spend less energy on navigating, parking, and backtracking.
I also like how the day is fueled. Lunch, snacks, and bottled water are included. In practice, that means you can keep your energy steady from crater-lake views through to the black-sand beach. If you are prone to getting cranky when meals are delayed, this structure helps a lot.
Two practical notes:
- Dress is smart casual, and the tour runs in all weather. Bring layers you can adjust fast.
- Because you’re moving as a group, be at the meeting area early and confirm you’re on the right side of pickup if there’s any instruction about where to wait.
Crater Views in Takapuna: Lake Pupuke and Takapuna Beach
The day starts with a quick stop at Lake Pupuke, a volcanic crater lake in the Takapuna area. It is short, around 15 minutes, but it’s a nice warm-up. You get a look at Auckland’s volcanic character without needing to be an expert on geology. Even a brief pause here sets the tone for the rest of the day.
From there, you also may stop around Takapuna Beach. The timing can vary, but the idea stays the same: get you looking at shoreline and sea views early, before the day gets more dramatic out west.
What I like about these early stops is that they are easy. There is no long hike required just to see something pretty and distinctly Auckland. If you only do a few walking breaks all day, these are the ones that keep things low-stress.
Westhaven Promenade and Auckland Domain: Marina Boats to Museum Rim Views
Next up is the Westhaven Promenade. This is one of those spots where Auckland suddenly feels like a real waterfront city, not just a big hub you’re passing through. You get around 10 minutes, enough for a few iconic photos and a look at the marina boats.
Then the tour heads toward Auckland Domain, with a stop that gives you views of the ancient volcanic caldera and the Auckland Museum from the outside. You do not go inside the museum here, and that’s a plus if you want variety in one day. If museums are your thing, you’ll probably want a separate visit later.
Here’s the practical takeaway: you see the museum setting on a crater rim and get context for the city’s shape, without losing half your day to indoor time. It’s a good trade-off on a schedule that also includes nature and a black-sand beach.
If the day is cloudy or rainy, this portion still works because the value is in the overlooks and positioning, not sunshine.
Over the pass and down the West Coast

Parnell Homes, Harbour Bridge Drives, and Rangitoto Island Vistas

The middle stretch shifts from crater views to city driving. You’ll pass through Parnell for views of colonial-era homes, then you’ll cross Auckland’s Harbour Bridge linking the city to the North Shore. This is also where the route gives you the kind of skyline and harbour angles most people only get from quick photo stops.
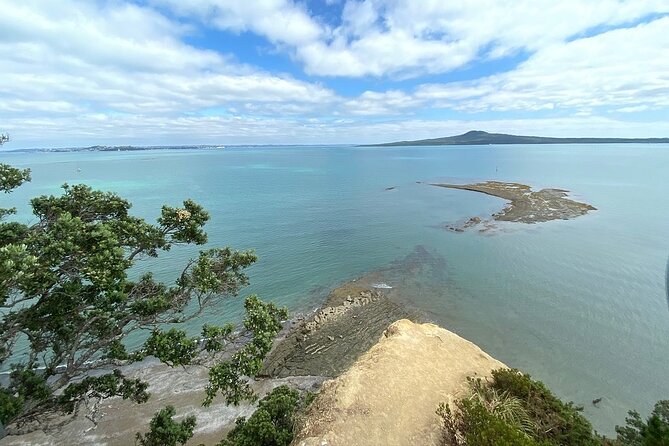
You’ll also get views of Rangitoto Island from Auckland city. Even if you don’t spend long here, it’s the sort of landmark that makes Auckland feel specific. It’s not generic city scenery, it’s a place with a real volcanic signature.
This part of the day is especially good if you’re first-timers. It gives you a fast education in what sits where, so later you can understand what you’re seeing on your own.
One small consideration: you’re doing a lot from the vehicle. If you hate car time and want lots of walking, you might feel you are mostly riding. That said, the tour structure keeps your walking focused for the nature stops, which is usually what people want on a day like this.
Titirangi to the Waitakere Ranges: Leaving the City Behind
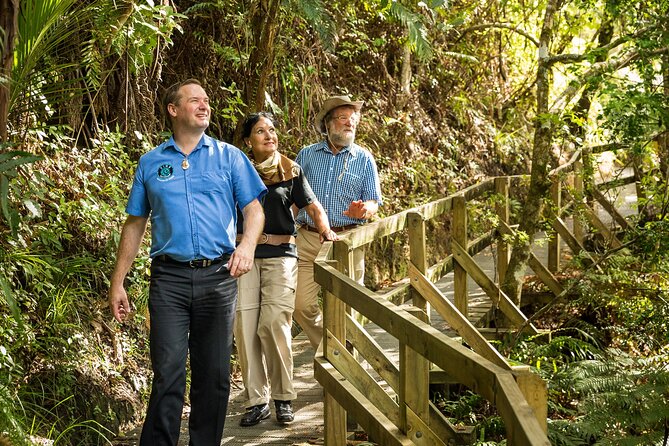
After the city highlights, you head toward Titirangi and the Waitakere Ranges. This drive is part of the fun. The West Coast route is a mood shift, moving from neighbourhood streets to that sense of rainforested terrain and coastal weather.
You’ll pass through Titirangi as you make your way to the viewpoints and nature areas. The tour keeps moving, so it’s not a slow scenic drive. But the route is selected so you feel the geography changing as the day unfolds.
On days with rain, you may be damp for parts of this drive. That’s normal here, and it’s exactly why you’ll want rain layers you can access fast.
Piha Beach: Black Sand, Surf Energy, and Lookout Time

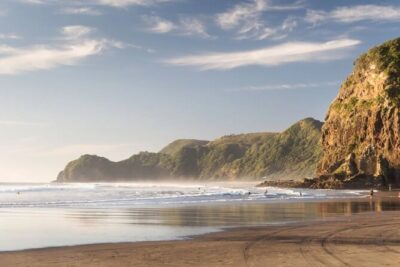
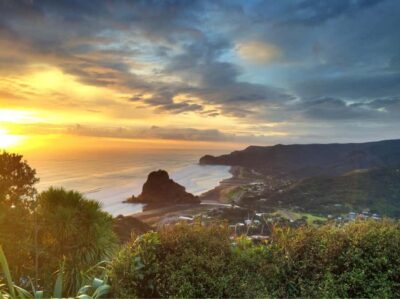
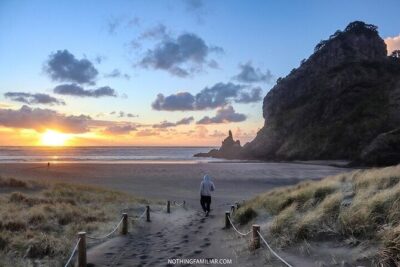
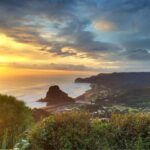
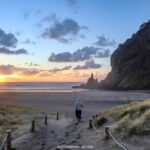
Piha Beach is the standout nature stop, with about 30 minutes at the beach area. This is where the day turns from city sights to dramatic coastline. Piha is famous for its black-sand beach and the surf culture vibe around it.
You will likely see Piha from viewpoints first, with enough time to take in how the beach sits within the rockier coastline setting. If conditions allow, you can also walk onto the sand. One tip that comes through clearly: you’ll enjoy Piha more if you plan to look in both directions, from the top for the full picture, then down at the beach for texture and color.
Even on a grey day, Piha can feel cinematic. Dark sand and weathered rock still give you contrast, and the beach often reads as more dramatic than it does on a sunny postcard.
Important reality check: weather can affect how things go out west. On at least one day, landslides and cyclone impacts prevented access to the West Coast, and the guide handled it by making alternative accommodations. So if you book this during a storm-prone period, build in flexibility and follow the guide’s calls on safety and routing.
Arataki Visitor Centre: Rainforest Views Back Over Auckland
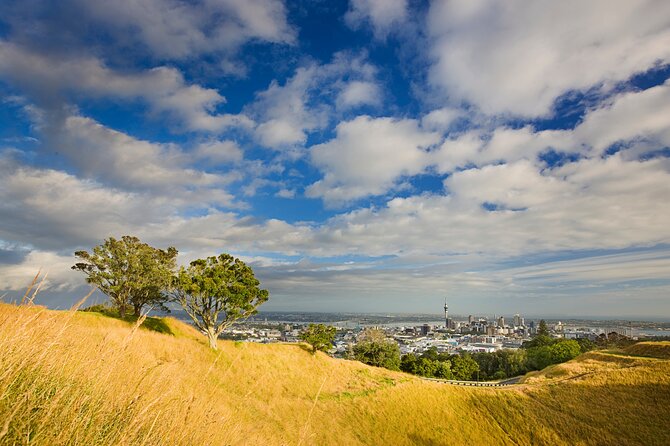
The next nature stop is the Arataki Visitor Centre in the Waitakere Ranges, also about 30 minutes. This is a great match for Piha because it turns the emphasis from beach drama to rainforest surroundings.
You get views back toward Auckland City in clear weather, plus the subtropical rainforest feel around you. Even if it’s not clear, you’ll still get the forest mood and the sense of being in a protected coastal range.
In practice, this is one of the stops where you can ask questions and get real meaning from the day. People tend to remember the idea that Auckland’s volcanoes and coastal geography created habitats that are still thriving with native species like pohutukawa. If your guide shares those stories, it makes the visuals easier to hold onto after the tour ends.
If the day is misty, don’t assume it’s a wash. The visitor centre stop is about vantage points and context, and mist can make the forest and the city distant silhouettes more striking.
Lunch and Snacks: Staying Comfortable on an 8-Hour Loop
Lunch is included, along with snacks and bottled water. That is a big deal on a tour that runs for about 8 hours. Instead of spending your energy tracking down food, you get a planned break.
You might eat at a restaurant stop in a coastal suburb. Davenport was mentioned as a great lunch setting in one account, with food described as delicious and the location as water-edge friendly. Even if your exact lunch spot differs, the key is that it is built into the timing so you do not lose sightseeing hours to hunting.
In terms of pace, the tour generally balances short stops with enough time to breathe. You are not stuck at one location for hours, and you are not rushed out before you can take in the view.
Small practical tip: if you have dietary needs, say so when booking. The data you provided does not list specific dietary options, so you’ll want to confirm through the operator before you go.
What the City Portion Adds (Even If You Skip the Museum Inside)
One reason this tour works for first-time Auckland visitors is that it does not treat the city as filler. You’re shown:
- volcanic crater lake scenery at Lake Pupuke,
- waterfront energy at Westhaven Promenade,
- Auckland Domain’s caldera setting and the Auckland Museum’s crater-rim positioning,
- and city-to-coast perspective through Harbour Bridge and Rangitoto viewpoints.
Then, the tour uses the city driving to set you up for the West Coast nature. When you reach Piha and Arataki, you’re not just seeing pretty scenery, you’re understanding how Auckland sits on volcanic and coastal systems.
The museum outside stop is a good example of restraint. The operator suggests that exploring inside the museum is outside this day’s scope. That’s helpful. You get the key city context without sacrificing your chance to see black sand and rainforest.
The Guide Factor: Personal Attention That Changes the Day
This tour has a strong theme: personal attention. The group size stays small enough that guides can speak directly, manage photo moments, and help you feel like you’re not just part of a number.
Guide names you may hear about in the day-to-day experience include Sophia, Kirstin, Romy, Lauren, Breviss, Ceillhe, and Chrissie, plus Harry and Donna as a guiding duo in some cases. Across these experiences, the common thread is storytelling that connects places to people, with some guides also sharing Māori cultural context and local language flavor.
A helpful sign of quality is that guides often keep the day moving at a human pace. Several accounts mention not feeling rushed, plus consistent snacks and water during the drive, and photo stops that actually matter.
Just keep one practical caution in mind: if pickup instructions are precise, show up where they expect you. There was at least one moment where a guide called out passengers by name for being missed at the bus, which usually means timing and meeting location details are taken seriously.
Who Should Book This Auckland City and West Coast Tour
Book it if you fit one of these:
- You want the best of Auckland and the Waitakere Ranges in one day without arranging a rental car.
- You like scenic lookouts more than long hikes.
- You want a guide who adds context, whether it’s geology, local culture, or how Auckland grew into a waterfront city.
- You’d rather have a planned snack-and-lunch rhythm than gamble on finding the right place at the right time.
It’s also a good fit for couples and small groups, since the tour max is 15 and the vehicle stays comfortable.
You might skip it if you strongly prefer deep museum time, because the museum is viewed from outside here. And if you hate long stretches in a vehicle, know that a lot of the city portion is drive-by sightseeing.
Family note: the minimum age is 4, and children must be accompanied by an adult. If you’re traveling with younger kids, the short stop times at each location can be a plus, but the overall 8-hour duration still counts.
Should You Book This Auckland City and West Coast Tour?
If you want one day that gives you both classic Auckland views and the dramatic West, this tour is easy to recommend. The value comes from the mix: transportation plus included lunch and snacks, plus nature stops that are hard to string together efficiently on your own.
My decision rule is this: if you are the type who wants to see a lot and you like your day planned with time to look, Piha and Arataki are worth it. If you want total control, linger longer at a single beach, or spend hours in museums, then you might prefer a self-guided plan.
If conditions are iffy during your travel dates, also remember the tour can adapt. Still, the main intent stays the same: get out of Auckland city fast, see the volcanic and rainforest side of the region, and come back with a strong feel for what makes Auckland more than just a stopover.
FAQ
How long is the Auckland City and West Coast full day tour?
It runs for about 8 hours.
Where does the tour start, and is pickup offered?
It starts at the Sky Tower area on Victoria Street West in Auckland Central. Pickup is offered, and the tour returns back to the meeting point.
What’s included in the price?
The price includes a Mercedes luxury vehicle, a professional driver/guide, national park fees, lunch, snacks, and bottled water, plus all local taxes.
Is lunch provided?
Yes, lunch is included along with snacks and bottled water.
How big is the group?
The maximum group size is 15 travelers.
Does the tour run in bad weather?
It operates in all weather conditions, so dress appropriately.
Can I cancel for a full refund?
Yes. Free cancellation is available up to 24 hours in advance for a full refund.
Everything Else We Wrote Up in Auckland





Over the Pass, Down the Coast


Auckland, More Days Out

Just added to our Auckland notes
- Rotorua to Auckland – Afternoon Transfer with Waitomo Caves★ 4.9 · 6 reviews
- Auckland Nature Tour★ 5.0 · 6 reviews
- Auckland: GoGuided Auckland City Tour★ 4.5 · 6 reviews
- Auckland: Full-Day City Tour★ 4.6 · 6 reviews
- Auckland: Half-Day Sea Kayak Tour to Motukorea Island★ 5.0 · 6 reviews
- Private Tour – Hobbiton Movie Set & Te Puia (Rotorua)★ 5.0 · 7 reviews
West Coast and Arthurs Pass, compared.
 ★ 5.0TranzAlpine Train, Arthur’s Pass and Castle Hill Day TripFrom $254426 reviews
 ★ 4.5TranzAlpine Train Journey: Christchurch to GreymouthFrom $151312 reviews
 ★ 5.0Arthur’s Pass Discovery and TranzAlpine Train – Small Group TourFrom $555272 reviews
 ★ 4.8Arthur’s Pass: TranzAlpine Train and Castle Hill Day TourFrom $245270 reviews
 ★ 4.8Arthur’s Pass Day Tour From Christchurch via Castle HillFrom $118203 reviews
 ★ 4.5Arthur’s Pass and TranzAlpine Train Day Tour from ChristchurchFrom $347202 reviews
 ★ 4.5Arthur’s Pass Day Tour From Christchurch with TranzAlpineFrom $258192 reviews
 ★ 4.5TranzAlpine Train Journey from Greymouth to ChristchurchFrom $151182 reviews
Browse the lists this tour appears in