
REVIEW · CITY TOURS
Garden and City tour
Dunedin’s biggest hits happen fast. This is a cruise-day friendly way to see the core of the city in about 4 to 5 hours, with a comfy air-conditioned ride and onboard commentary as you bounce between viewpoints, gardens, and classic streets. I like the payoff-to-time ratio, and I especially like that Baldwin Street is built into the day as an optional challenge, not just a quick drive-by.
The one thing to keep in mind is that the schedule is tight. Each stop is short, so if you want a slow wander or deep time in one place, you may feel a bit rushed, and there is some walking involved (including the steep street if you choose to go for it).
In This Review
- Key takeaways before you go
- Why Port Chalmers days need a tight Dunedin plan
- The ride, group size, and why your driver matters
- Stop 1: The Octagon, your fast map of central Dunedin
- Stop 2: Baldwin Street, view it or walk it
- Stop 3: Signal Hill, the lookout that changes with the weather
- Stop 4: Dunedin Botanic Gardens, where the time feels well spent
- Stop 5: Dunedin Railway Station, classic architecture and a quick reset
- Stop 6: Toitu Otago Settlers Museum, heritage you can actually manage
- Price and value at about $37.23 per person
- Timing, walking, and how not to get caught off guard
- Who should book this Dunedin garden and city tour
- Should you book the Garden and City Tour?
- FAQ
- How long is the Garden and City tour from Port Chalmers?
- What is included in the price?
- Is lunch included?
- Which stops are included on the itinerary?
- Can I walk up Baldwin Street or do I just view it?
- Is pickup offered?
- How large is the group?
- Where does the tour start and end?
- Does it operate on non-cruise days?
- What if I need to cancel?
Key takeaways before you go
- Max group size 36, so you still get a small-tour feel even with a busy port day
- Baldwin Street is optional, letting you view it or walk up if you’re up for the challenge
- Botanic Gardens stop is flexible, with upper garden and aviary time if parking allows, otherwise lower gardens and greenhouses
- Guides like Craig are repeatedly praised for humor and clear stop-by-stop guidance
- Free time at key sights helps you shop a little and take photos without feeling glued to the glass
More of Port Chalmers on foot and by road
- Cruise Dunedin City and Castle Tour
★ 5.0 · 142 reviews - Iconic Shore Excursion: Dunedin City Highlights Tour
★ 5.0 · 131 reviews - Castle, Coast & City Tour – 8 pax max – Castle Entrance Included
★ 5.0 · 102 reviews - Dunedin City and Coastal Views 3-Hour Small-Group Guided Tour
★ 4.5 · 90 reviews
Why Port Chalmers days need a tight Dunedin plan
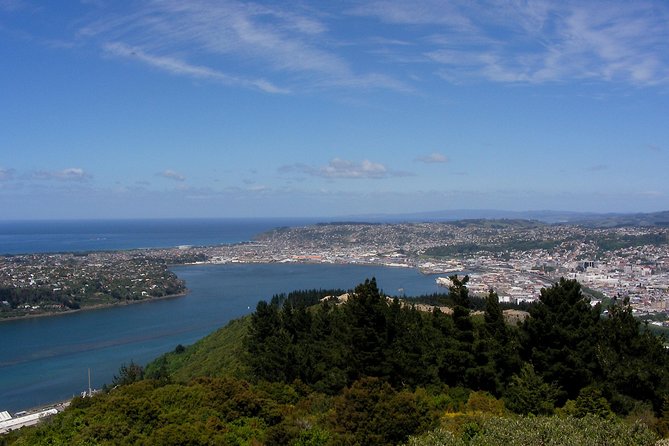
Port Chalmers is perfect for people who want Dunedin highlights without gambling on public transport timing. This tour is designed for cruise ship days only, so the whole plan is built around the ship window, and you start and finish at the cruise terminal area.
What makes the day work is the mix. You get city landmarks (The Octagon and the Railway Station), a signature steep street moment (Baldwin Street), an iconic lookout (Signal Hill), and then a green reset in the Botanic Gardens. That blend matters on a port day, because you are not just stacking buildings. You are also getting views and plants, which helps the hours feel less repetitive.
And yes, it is a short day. But it does not feel like a drive-thru. The tour includes a commentary-led bus ride plus actual time on the ground at every major stop.
The ride, group size, and why your driver matters
This tour runs in a comfortable vehicle with onboard commentary, and that matters more than you might think. When a guide paces the day well, you get context while you’re moving, and you arrive at each stop with the right expectations.
A strong pattern shows up in the reviews: the guides are often credited with humor, clear communication, and making the city feel personal. Craig, in particular, is mentioned often for being engaging and for injecting personality into the ride. Other names show up too, including Damon, Rob, Andrew, and Pam, which hints that the guiding team is experienced at running a port-day schedule.
Group size is capped at 36 people, so you are unlikely to feel lost in a crowd. That also helps with practical stuff like boarding efficiently and keeping the whole group together between stops.
One small practical tip from the review comments: if you want the commentary to land clearly, sit toward the front of the bus. It is a quick fix that can make the difference between hearing the story and catching only fragments.
Stop 1: The Octagon, your fast map of central Dunedin
The Octagon is Dunedin’s central hub, and it works as the first stop because it helps you orient immediately. You get about 30 minutes here, and it is free to enter. That time is enough to get a feel for the layout and snap a few photos without turning the first hour into an all-out walking tour.
Why I like starting with a central square: it gives you a reference point for everything you will see next. When you later hit Signal Hill and Baldwin Street, you understand what is where, and you can connect the viewpoints back to the city core.
If you are the kind of person who likes to ask What is this area? this is your moment. Grab your bearings, look around, and if the sidewalks are busy, no stress. This stop is built for easy cruising.
Stop 2: Baldwin Street, view it or walk it
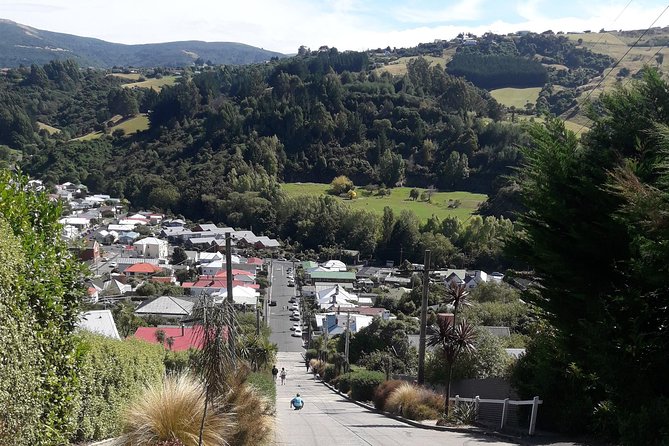
Baldwin Street is the headline for a reason. It is widely known as the steepest residential street in the world, and this tour gives you two options: view it or walk up. You get about 10 minutes, and it is free.
Ten minutes sounds short, but it is exactly right for the street. This is not a long-distance hike. It is a quick, memorable effort. If you walk, go slow, use your judgment, and treat it like a fun workout, not a race. If you only want the photo and the sightline, that is also fine. You still get the story and the perspective.
There is one practical consideration here: it is steep. So if your mobility is limited, you may prefer to watch rather than climb. The tour still makes the stop worth it because you can experience the slope visually and from nearby viewpoints.
The payoff is that it turns into a “we really did that” memory, not just another photo from a roadside pull-over.


Stop 3: Signal Hill, the lookout that changes with the weather

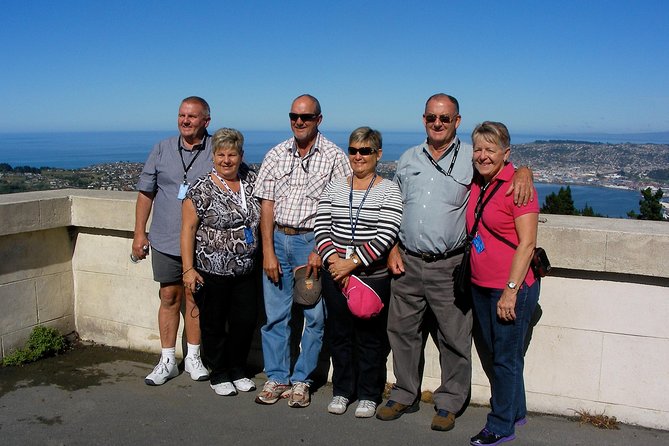
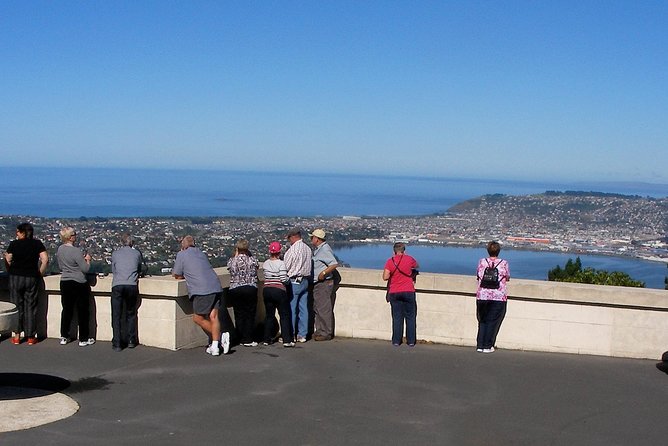
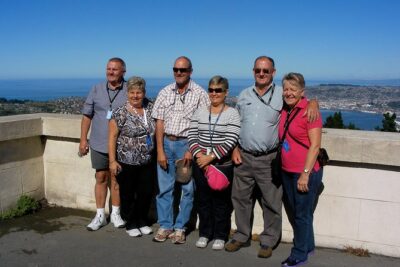
From Baldwin Street, the tour heads to Signal Hill for about 15 minutes. Again, it is free, and it is a proper lookout stop, meaning you are meant to take in Dunedin from above.
Signal Hill is a smart mid-tour stop. It gives you a breather from street-level walking and gives your eyes something to reset on. It is also the kind of place where weather can shift quickly. One review specifically called out changing conditions from stop to stop, so expect that you might want layers or a quick grab for shade depending on what the sky does.
When you arrive, take a minute before you start photographing. Look first, then shoot. That helps you understand where the city sits and where the coast or hills influence the shape of Dunedin.
This is also a good moment to ask yourself if you want to spend more time anywhere later. The tour is short, but a quick preview helps you decide what would be worth revisiting on a future day.
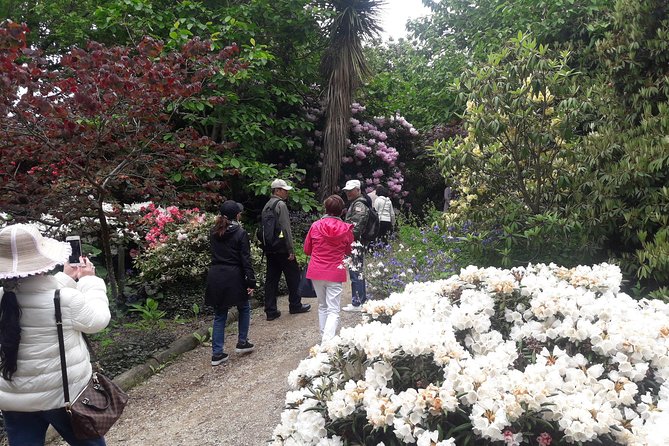
Stop 4: Dunedin Botanic Gardens, where the time feels well spent
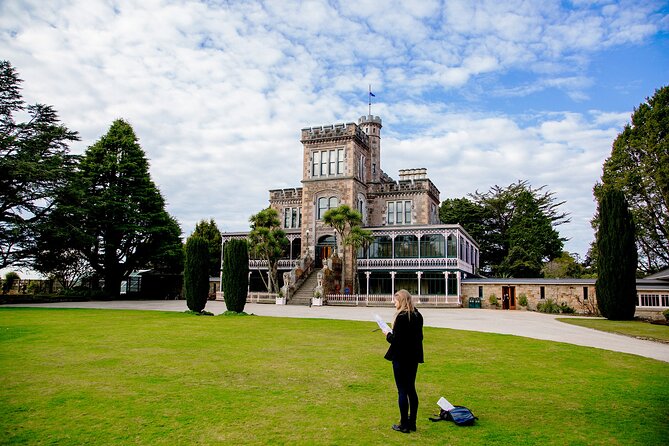
Next up is the Botanic Gardens, with about 30 minutes allotted. The gardens are free to enter, and there is a detail worth knowing: depending on parking, you might spend time in the upper gardens and aviaries, or you might focus on the lower gardens and greenhouses.
That flexibility is actually helpful. It means the tour can keep things moving smoothly on a cruise day, when parking and traffic can be unpredictable. It also means you are likely to see something different from another day’s version of the itinerary, even if the tour name stays the same.
What I like about this stop for real-life visitors is that it gives you variety in a limited time. You can admire plants at ground level even if you do not want to do extra walking, and if you do feel energetic, the gardens allow for that too.
One review mentioned that some sections may involve moderate climbing, so wear shoes you trust. Even if you stay mostly on easier paths, you still get the benefit of a proper garden break, not just a quick curb-side pass.
If you love photos, this is one of your best windows. The gardens provide natural backdrops, and the variety of greenery helps you get more interesting shots than you usually would from the city streets alone.
Stop 5: Dunedin Railway Station, classic architecture and a quick reset
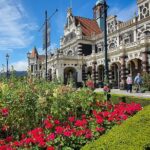
After gardens, you head to Dunedin’s historic Railway Station for about 10 minutes. It is free, and it is another stop that works well in a tight itinerary because it is quick to appreciate even if you cannot linger.
Why this stop is valuable: architecture adds texture to a city day. The Railway Station is one of those places that looks like it has stories in its walls, even when you are only there briefly. A short photo session plus a walk around the main areas can still feel satisfying because the structure is so defining.
Also, this timing helps you. After the steepness of Baldwin Street and the walking around gardens, 10 minutes at a station is a lighter physical load. You can slow down, look around, and let your legs catch up.
Stop 6: Toitu Otago Settlers Museum, heritage you can actually manage

The final major stop is Toitu Otago Settlers Museum, with about 20 minutes. It is free, and the museum also has a cafe available, though lunch is not included in the tour price.
Twenty minutes is not long enough to read everything, so approach it like a highlight sprint. Look for the exhibits that match what you find most interesting: the settlement story of Otago, the way people built communities, and how Dunedin grew from those early roots.
Why I think this works on a cruise day: museums can eat time fast. This one is paced to keep you moving, but it still gives you a real taste of the area’s heritage. Even if you only sample a couple of galleries, you’ll leave with a clearer sense of what shaped the city.
If you want a snack, the cafe option is a bonus. Since lunch is not included, this can help you avoid getting hungry right at the end of the tour.
Price and value at about $37.23 per person
At around $37.23 per person, this tour sits in the “good value” category for Port Chalmers days. The math is simple: you get an air-conditioned vehicle, onboard commentary, and multiple high-demand stops that are otherwise hard to piece together quickly on your own.
Some review comments compare it favorably to cruise ship tours in both cost and value. The recurring theme is that this option costs much less than cruise-only excursions, while still hitting the big sights and getting you back with time to spare.
The best way to think about the price is what it buys you: time efficiency and coordination. On a short port stop, that is worth a lot. You are not spending your energy figuring out routes or transport schedules. You are using your limited time to see the city.
Also, you get a maximum of 36 people, not a huge bus crowd. That helps the day feel smoother and less chaotic, which is part of why it feels like a solid value instead of a budget afterthought.
Timing, walking, and how not to get caught off guard
This is a 4 to 5 hour tour, and it follows a structured sequence from central Dunedin to viewpoints and then into gardens and heritage. The biggest practical risk is the same for any highlight itinerary: the “just enough time” model.
So plan smart:
- Wear comfortable shoes. There is some walking, and Baldwin Street is the steep one.
- Bring a light layer. Weather can change quickly from stop to stop.
- If you care about hearing the guide clearly, sit toward the front.
- Treat museum time like sampling, not studying. Use the 20 minutes to pick the parts that interest you most.
One more thing: this tour includes free time at key points. That is a real advantage. You can buy a souvenir, use the facilities if needed, and take photos without feeling like you are constantly on a leash.
And you will still finish back at the meeting point at the end of the day. So you are not stuck guessing where you are supposed to be for the ship.
Who should book this Dunedin garden and city tour
This tour is ideal for you if:
- You are in Dunedin for only a few hours from Port Chalmers.
- You want a quick overview of major sights, without needing to plan transport.
- You like city landmarks and viewpoints, but you also want a garden break.
- You enjoy guided storytelling while you move between stops.
It is also a great fit for groups who want one shared plan. The max 36 size helps, and the route is built around iconic stops that almost everyone recognizes.
If you are traveling with limited stamina, do not ignore the walking and slopes. Baldwin Street and some garden areas can be challenging. You can still enjoy the sights by choosing to view rather than walk and by sticking to easier garden sections, but you should go in with that awareness.
Should you book the Garden and City Tour?
If you want the easiest cruise-day route to Dunedin highlights, I would book it. This is a well-paced sampler: Octagon for orientation, Baldwin Street for the headline moment, Signal Hill for the viewpoint reset, Botanic Gardens for a nature pause, then Railway Station and Toitu for heritage flavor.
The reason it earns such strong ratings is pretty clear: you get a lot done in a short time, and the guides who run it tend to make the ride enjoyable, not just instructional. If you show up ready to walk a bit and you treat each stop as a highlight rather than a deep visit, you will come away feeling like the day had real value.
FAQ
How long is the Garden and City tour from Port Chalmers?
It runs about 4 to 5 hours.
What is included in the price?
The tour includes an air-conditioned vehicle and onboard commentary.
Is lunch included?
No, lunch is not included. A cafe is available at Toitu Otago Settlers Museum.
Which stops are included on the itinerary?
You visit The Octagon, Baldwin Street, Signal Hill, Dunedin Botanic Garden, Dunedin Railway Station, and Toitu Otago Settlers Museum.
Can I walk up Baldwin Street or do I just view it?
You can view Baldwin Street or walk up it. The walking is optional.
Is pickup offered?
Pickup is offered.
How large is the group?
The maximum group size is 36.
Where does the tour start and end?
It starts at the Port Chalmers Cruise Terminal (21 Beach Street, Port Chalmers) and ends back at the meeting point.
Does it operate on non-cruise days?
The tour operates only on cruise ship days.
What if I need to cancel?
Free cancellation is available if you cancel at least 24 hours before the experience’s start time for a full refund.
Port Chalmers at Street Level



The Wider Port Chalmers Shortlist

Everything Else We Wrote Up in Port Chalmers

Just added to our Port Chalmers notes
- Clearwater Private Penguin & Wildlife Tour from Port Otago (5hrs)★ 5.0 · 7 reviews
- Dunedin Shore Excursion – Sightseeing, Larnach Castle, Chinese Garden & Museum★ 3.5 · 13 reviews
- Otago Harbour Wildlife Cruise (Dunedin Shore Excursion)★ 4.5 · 16 reviews
- Half day Private Tour of Dunedin City Highlights and Peninsula Scenery★ 5.0 · 18 reviews
- Harbour, Albatross and Wildlife Cruise on Otago Harbour★ 4.5 · 22 reviews
- From Port Chalmers: Small Group Castle, Coast & City Tour★ 4.8 · 22 reviews
City Tours, compared.
 ★ 5.0Half-day Discover Auckland City Sightseeing TourFrom $461,080 reviews
 ★ 4.5Christchurch Gondola and Tram City Tour ComboFrom $46725 reviews
 ★ 4.8Wellington: Guided City Tour with Cable Car TicketFrom $53553 reviews
 ★ 4.8Auckland Scenic Half-Day City Sightseeing TourFrom $44532 reviews
 ★ 5.02025 Award Winning: Auckland City Highlights Half Day TourFrom $99516 reviews
 ★ 5.0Auckland: Flavours of our City Food WalkFrom $127371 reviews
 ★ 4.6Rotorua City and Lakes Duck TourFrom $53255 reviews
 ★ 4.0Akaroa Shore Excursion: Banks Peninsula and Christchurch City Sights TourFrom $89228 reviews
Browse the lists this tour appears in